
SonarQube, also known as Sonar is an open-source tool for continuous code quality that measure and analyze the source code. It is built in Java, but capable to analyze code in 20 diverse languages. SonarQube that not only checks the code and highlights the issues, but also tracks and monitors the code continuously and ensures flawless code integration as well as deployment. It can display the result of the analysis in a visually appealing way using nice charts, ‘green & red lights’, and issues list. it tries to detect bugs, code smells and security vulnerabilities. Many plugins are available to use it as part of continuous integration pipelines, including for Maven, Jenkins and GitHub.
Prerequisites:
SonarQube requires atleast 2 GB of Ram.
- Install Java.
- Install and configure mysql.
- Create db and user for SonarQube.
- Install and configure SonarQube.
- Integration with Jenkins Server
Step 1:- Install Java
yum install java-1.8*Set path for JAVA_HOME
For setting Java path follow this link ,here
Step 2:- Install and configure mysql
wget http://repo.mysql.com/mysql-community-release-el7-5.noarch.rpm
sudo rpm -ivh mysql-community-release-el7-5.noarch.rpm
sudo yum install mysql-serverOnce installed start check the status of the mysql service
sudo systemctl start mysqld
sudo systemctl status mysqld
Configure mysql db by running mysql_secure_installation
mysql_secure_installation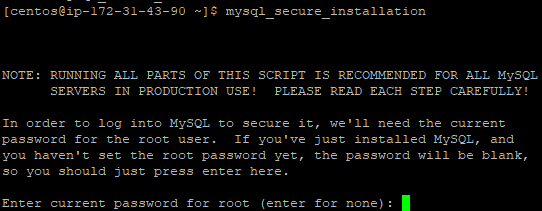
Step 3:-Create db and user for SonarQube
Login into mysql server
mysql -u root -pfor password just Enter
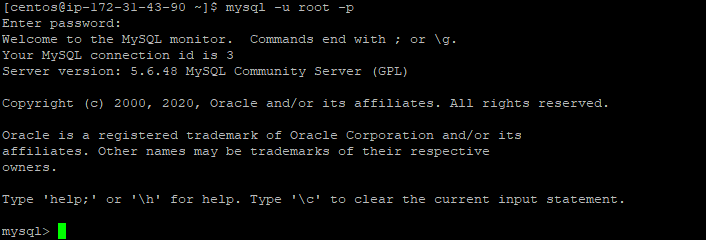
Create db with below script
CREATE DATABASE sonarqube_db;
CREATE USER 'sonarqube_user'@'localhost' IDENTIFIED BY 'password';
GRANT ALL PRIVILEGES ON sonarqube_db.* TO 'sonarqube_user'@'localhost' IDENTIFIED BY 'password';
FLUSH PRIVILEGES;
exit
Step 4:- Install and configure SonarQube
Create a new user and set password for SonarQube
sudo useradd sonarqube
sudo passwd sonarqube
Download the latest version of SonarQube from the URL
sudo wget https://binaries.sonarsource.com/Distribution/sonarqube/sonarqube-6.7.7.zip
Unzip and rename it
 sudo unzip sonarqube-6.7.7.zip
 sudo mv sonarqube-6.7.7 sonarqube
Change the owner of the sonarqube directory
sudo chown -R sonarqube:sonarqube sonarqubeOpen the sonarqube configuration file for changes
sudo vi /u01/sonarqube/conf/sonar.propertiesEnter the database details below
sonar.jdbc.username=sonarqube_usersonar.jdbc.password=passwordsonar.jdbc.url=jdbc:mysql://localhost:3306/sonarqube_db?useUnicode=true&characterEncoding=utf8&rewriteBatchedStatements=true&useConfigs=maxPerformance
add below entry in sonar.properties file
RUN_AS_USER=sonarqubeSave and Exit
Now configure SonarQube as a systemd service
Create a sonar.service file in system
sudo vi /etc/systemd/system/sonar.serviceAdd the below script
[Unit]
Description=SonarQube service
After=syslog.target network.target
[Service]
Type=forking
ExecStart=/u01/sonarqube/bin/linux-x86-64/sonar.sh start
ExecStop=/u01/sonarqube/bin/linux-x86-64/sonar.sh stop
User=sonarqube
Group=sonarqube
Restart=always
[Install]
WantedBy=multi-user.target
Now start and check the status of the sonar service
sudo systemctl start sonar
sudo systemctl status sonar
sudo systemctl enable sonar
check the sonar using URL http://ip_address:9000
The default username and password of SonarQube is admin and admin.
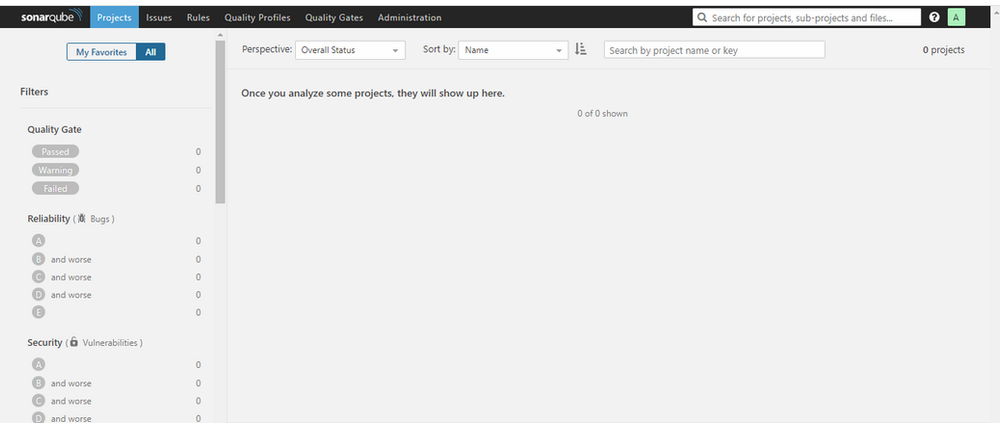
Step 5:- Integration with Jenkins Server
- Install Git in your system
sudo yum install git -y- Install SonarQube scanner
sudo wget https://binaries.sonarsource.com/Distribution/sonar-scanner-cli/sonar-scanner-cli-4.0.0.1744-linux.zip
Unzip the file and rename it
sudo uzip sonar-scanner-cli-4.0.0.1744-linux.zip
sudo mv sonar-scanner-cli-4.0.0.1744-linux.zip sonar-scanner
Set SonarQube sever details in sonar scan property file
sudo vi /u01/sonar-scanner/conf/sonar-scanner.propertiesuncomment the sonar.host.url and replace localhost with your sonarqube server ip

save and exit
Now login to your Jenkins server GUI and install SonarQube scanner plugin
Navigate to Manage Jenkins > Manage Plugins > Avalable > SonarQube scanner
Check the SonarQube Scanner and Install without Restart
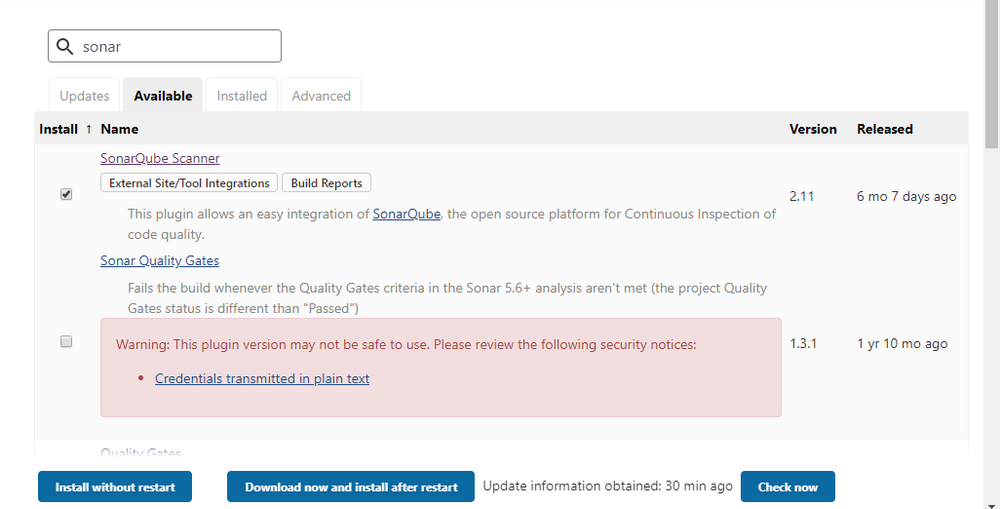
- Configure SonarQube server name and authentication token
Navigate to Manage Jenkins > Configure Systems > SonarQube Servers
Add Name =sonarserver
Server URL = <http://ip_of sonarserver:9000>
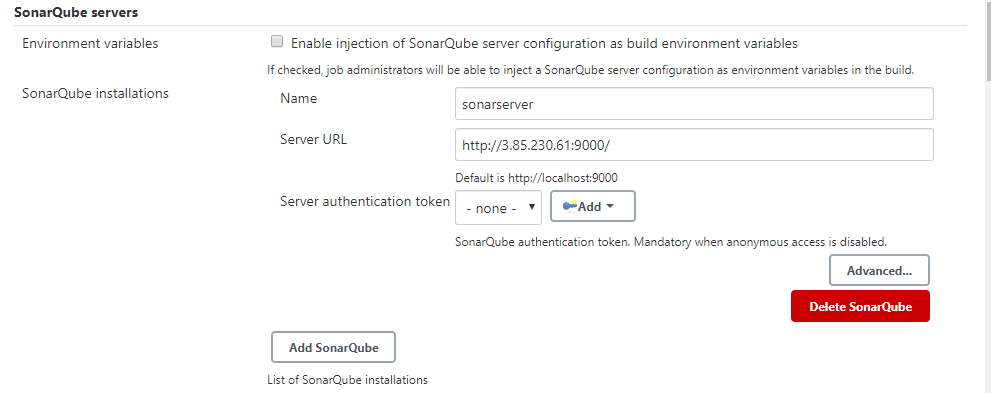
Server authentication token To Get Authentication code follow below steps.
Login to SonarQube server as a admin My Account > Security > Generate Token
write token name and click Generate
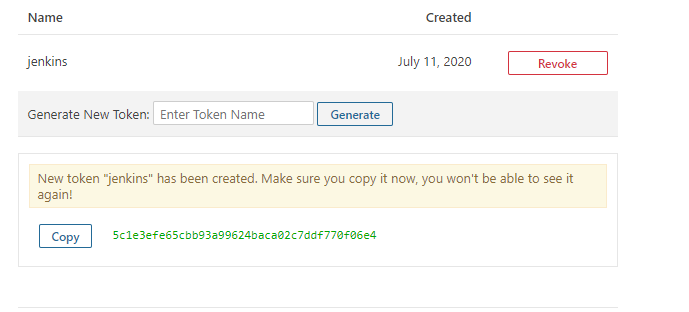
Now again navigate to Manage Jenkins > Configure Systems > SonarQube Servers
click the “add “tab near the “server authentication token”.
It will prompt a new tab like this , now in kind tab drop down and select secret text
Paste the secret text in the Secret column that you generate in above step and add Description.
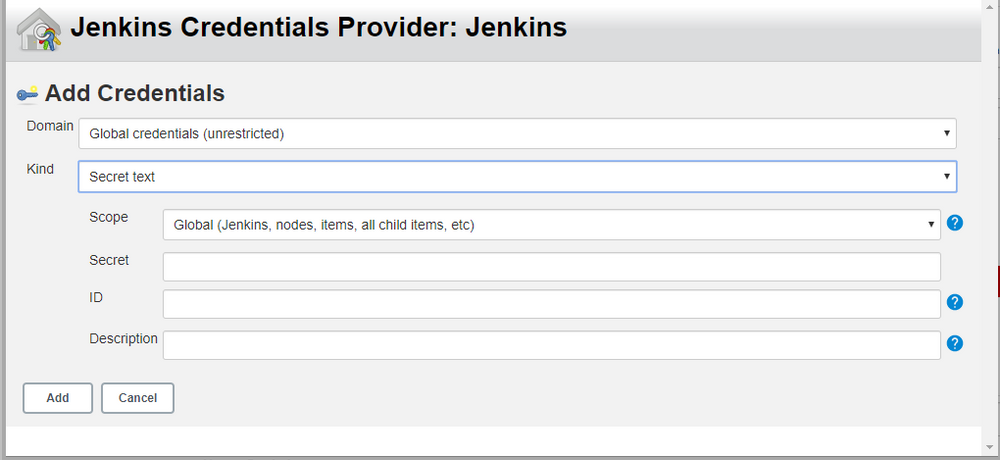
Click “Add”
After the credentials has been added , drop down the first tab and select the name of token that you created above.

Click Save
- Configure SonarQube scanner home path
Navigate to Manage Jenkins > Global Tool Configuration > SonarQube Scanner
Add the path to sonar scanner
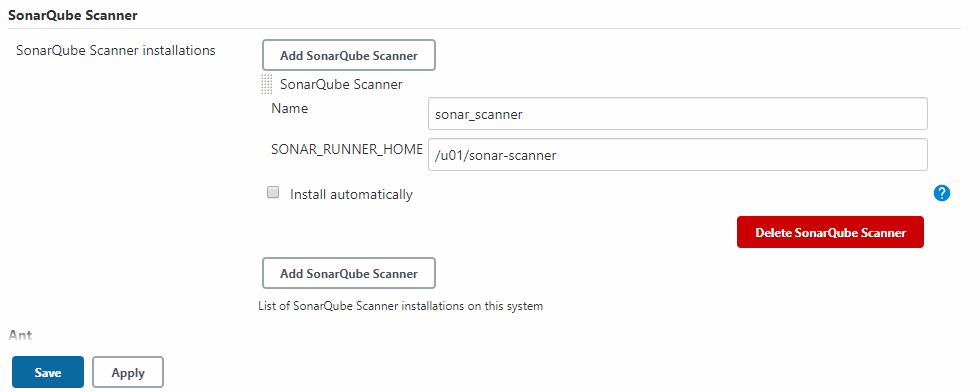
Click “save”
- Create a Free style project and configure source code and Build
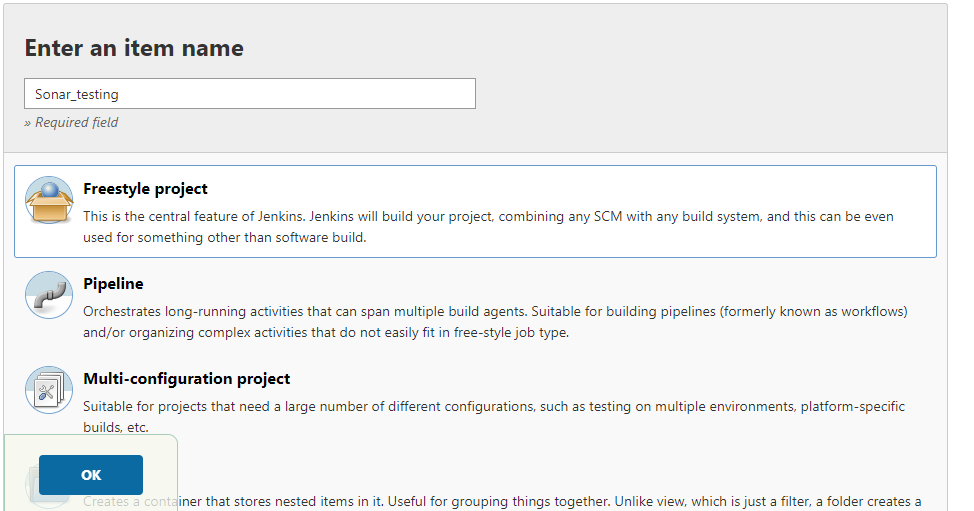
Click “OK”
Configure source code Management
Add the git Repository URL and credentials
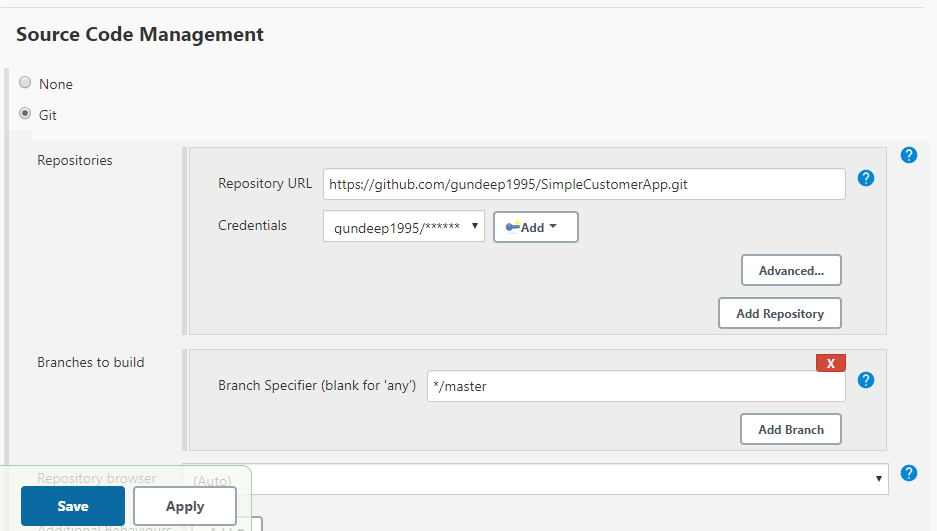
Scroll down and find the “Build “field > Add build step
Select Execute SonarQube Scanner
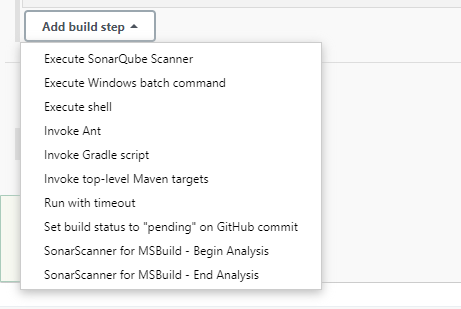
After Selecting add the following Analysis properties (mandatory) according to your project
sonar.projectKey=cloudsbaba
sonar.projectName=cloudsbaba_demo
sonar.projectVersion=2.0
sonar.java.binaries=/usr/local/bin
sonar.sources=/var/lib/jenkins/workspace/$JOB_NAME/SimpleCustomerApp/SimpleCustomerApp/src
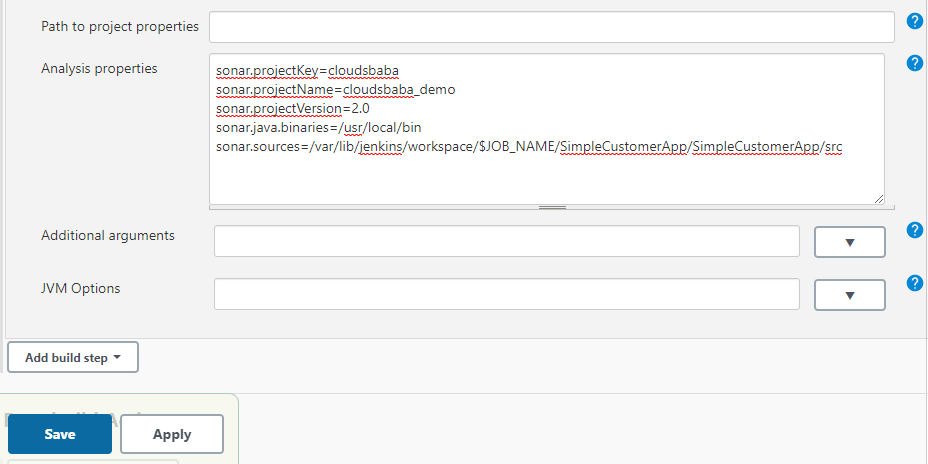
Save
Now Build this project
click on build
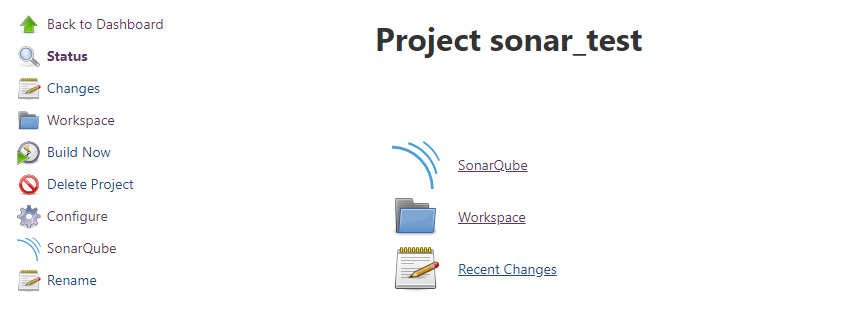
check the console output for this build
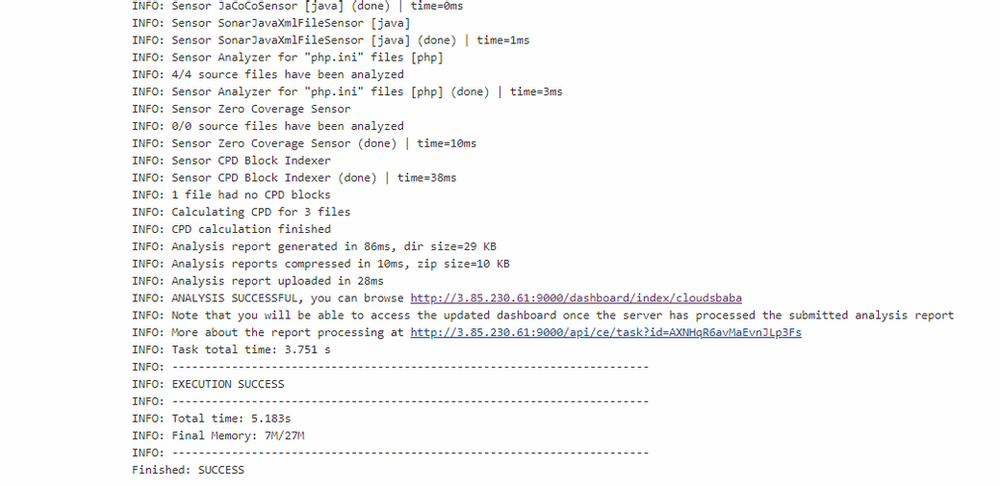
As you can see the build is successful.
Now browse the URL http://3.85.230.61:9000/dashboard/index/cloudsbaba as shown in your console output , you will redirect to SonarQube page and show the below analysis for your code
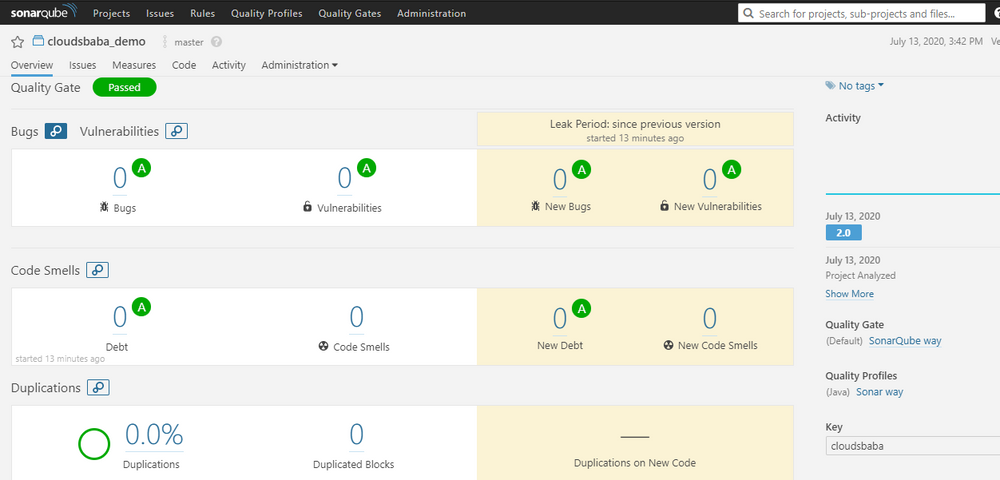
Congratulations…. You follow all the steps and configure SonarQube for code analysis .
For more updates and content please subscribe www.cloudsbaba.com/subscribe
References:-
- https://www.sonarqube.org/
- https://github.com/
- https://docs.sonarqube.org/latest/analysis/scan/sonarscanner-for-jenkins/


