As we know we can’t be present all the time in each and every situation in the real life, to complete your absence or can check the proper scenario likewise what is happening when you are not there,Here we came up with the simple and day to day use thing called as CAMpi. A CAMpi is all about capturing the real life moment in the form of the video and picture.Through this project you can just fill your absence around the globe.
Description: Picture capture and video recording in a simple steps using raspberry pi,camera and python
what we need?
- raspberry pi( For this prorject i’m using raspberry pi 2)
- Raspberry Pi Infrared IR Night Vision Surveillance Camera Module 500W Webcam
- 5MP Raspberry Pi 3 Camera Module W/ HBV FFC Cable
LET’S GET STARTED
It’s recommended to install the following software
PUTTY software:
PUTTY is an SSH and telnet client, developed originally by Simon Tatham for the Windows platform. PUTTY is open source software that is available with source code and is developed and supported by a group of volunteers. Official page to download
VNC Server: Virtual Network Computing (VNC) is a graphical desktop-sharing system that uses the Remote Frame Buffer protocol (RFB) to remotely control another computer.
Installation and Connecting with your PC
For the installation of the OS in pi you can go to the officially raspberry pi site and download their own OS or any other if u know how to install it. So here i am using linux operating system.
- Connect raspberry pi with power supply
- Run the putty software in your computer, enter the IP address of your raspberry pi
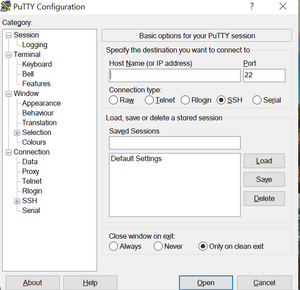
- So it ask for login credentials, enter your username and password
If you have signup with raspberry pi then you have to login via username and password
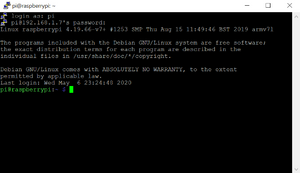
Now you are in raspberry pi
NOTE: Connect the raspberry pi with camera before power supply.
WORKS INSIDE RASPBERRY PI
To view interface of the raspberry pi you have to run the command $vncserver in the raspberry pi
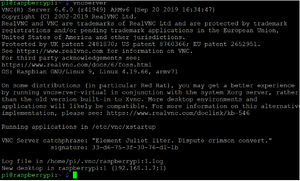
Now run the software VNC server,there you get the field for entering the IP address.
In our case the IP address is 192.168.1.7:1 on your screen its interface of the raspberry pi

Now your Camera Module is connected and the software is enabled, try out the command line tools $raspistill and $raspivid.
This command is to control the camera module with command line.

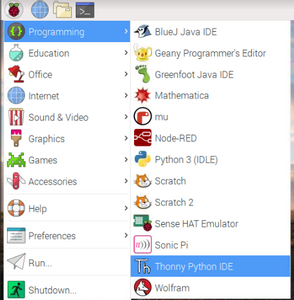
open raspberry pi interface on your top left corner there’a main menu
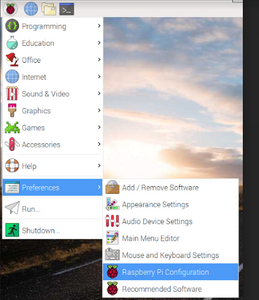
Now open Thonas python IDE Programming
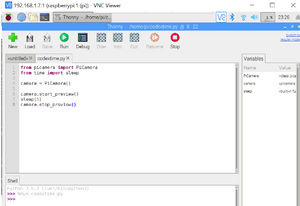
Write down the following code for capturing picture
[pastacode lang=”markup” manual=”from%20picamera%20import%20PiCamera%0Afrom%20time%20import%20sleep%0Acamera%20%3D%20PiCamera()%0Acamera.start_preview()%0Asleep(5)%0Acamera.stop_preview()” message=”” highlight=”” provider=”manual”/]
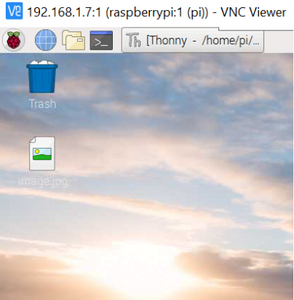
See on desktop .jpg has been created.
Now we create a loop for clicking 5 pictures
from picamera import PiCamera
from time import sleep
camera = PiCamera()
camera.start_preview()
for i in range (5):
sleep(5)
camera.stop_preview()
Run the code again and hold the Camera Module in position
Look at your Desktop to find the five new pictures.
Note: the camera preview only works when a monitor is connected to your Raspberry Pi. If you are using remote access (such as SSH or VNC), you won’t’ see the camera preview.
Recording video
Amend your code to remove capture() and instead add start_recording() and stop_recording()
[pastacode lang=”markup” manual=”from%20picamera%20import%20PiCamera%20from%20time%20import%20sleep%20camera%20%3D%20PiCamera()%20%0Acamera.start_preview()%20%0Acamera.start_recording(‘%2Fhome%2Fpi%2FDesktop%2Fvideo.h264’)%20%0Asleep(5)%20camera.stop_recording()%20camera.stop_preview()” message=”” highlight=”” provider=”manual”/]
Run the code
Your Raspberry Pi should open a preview, record 5 seconds of video, and then close the preview.


